Introduction
Cool, isn’t it?
Now that our first board is on it’s way - OSHPark says that it will be back from the Fab in a day or so, and then it’ll be a few days to arrive via the (free-shipping) USPS, it’s not a bad time to think about assembly. This is going to require two things - a solder stencil for the board, and the components to place on it.
Solder Stencils
My own journey through attaching components to PCBs has been through 3 phases.
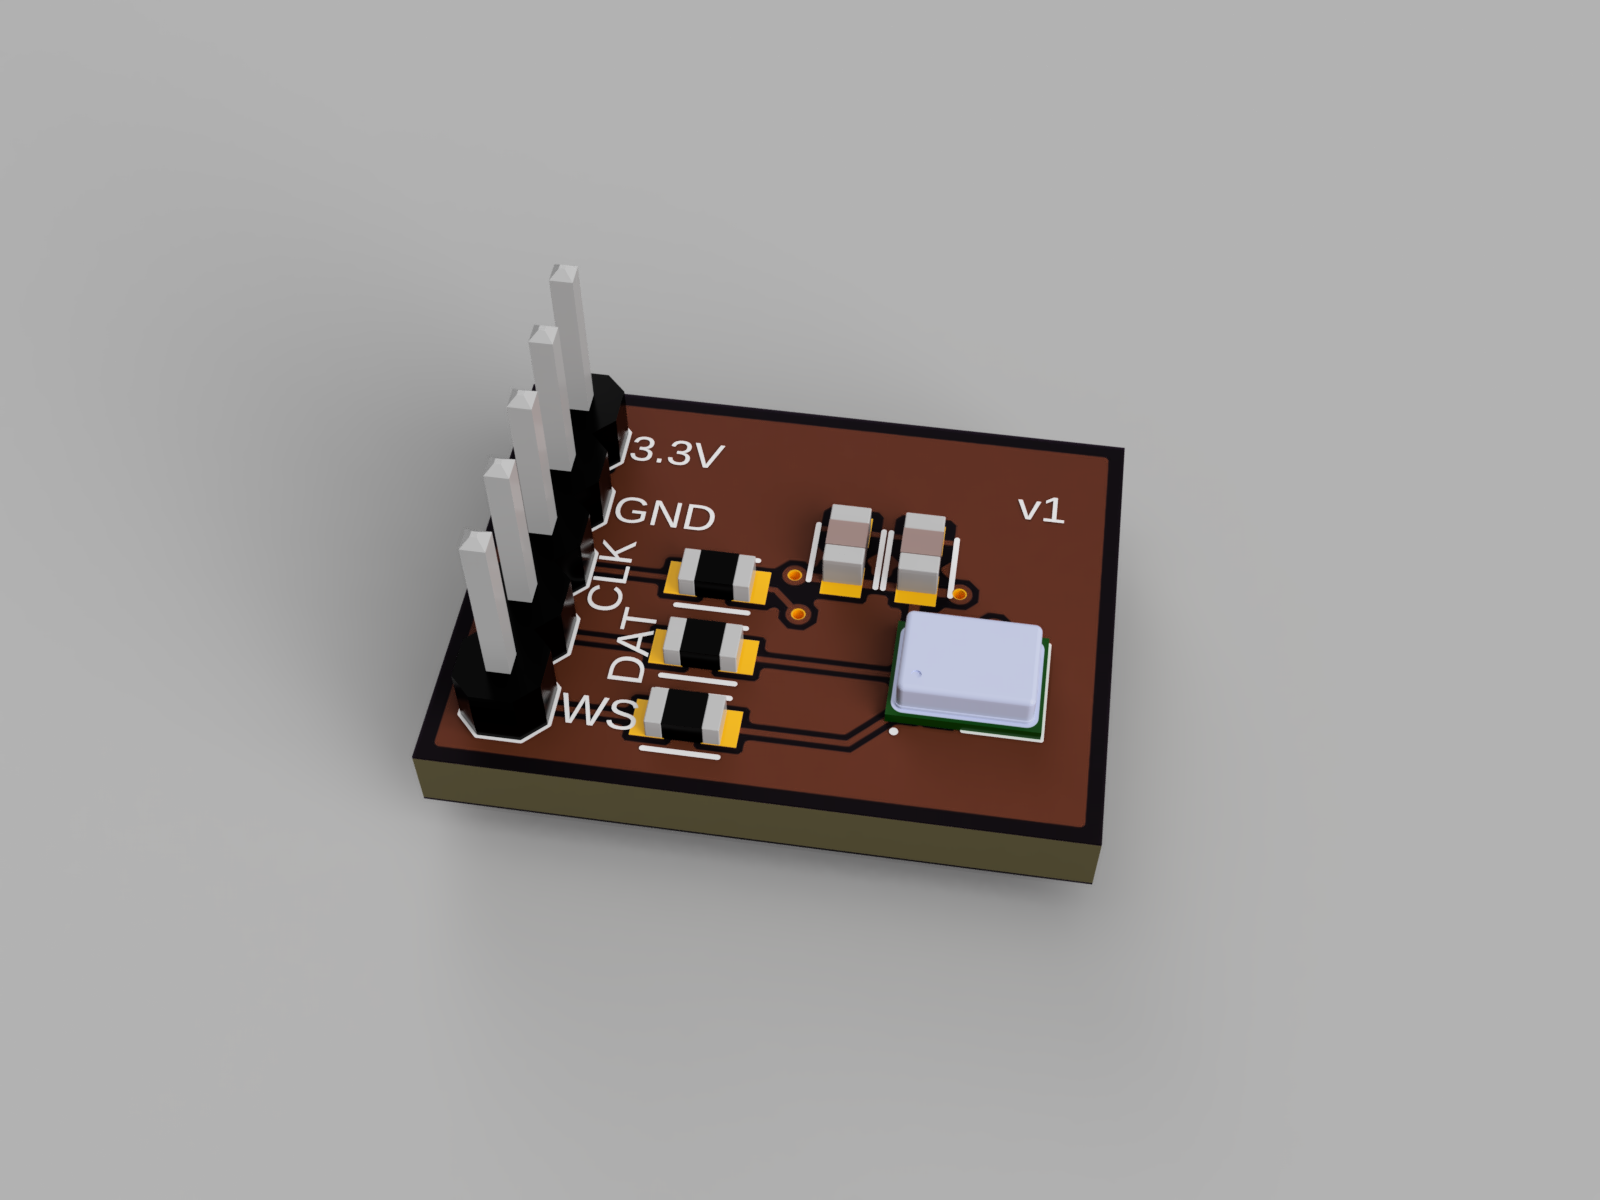
The first PCBs that I ever assembled were with through-hole components. These are the type that are by far the easiest to hand-assemble if you’re proficient with a soldering iron, and that’s where almost everybody starts (and many people don’t feel hindered at all by being restricted to these parts). The part leads go through a plated hole in the PCB - typically soldered on the back side of the board. The 5-pin header on this microphone breakout PCB is a through-hole component.
However - while you can still basically find almost any passive component (resistor, capacitor) that you might ever want in a through-hole package, almost all actually modern, interesting ICs don’t come in through-hole versions. They’re bigger, more expensive, and the equipment to solder through-hole boards (a ‘wave solder machine’) is specialized and more complicated and expensive than the solder reflow ovens that can be used if the entire board uses surface-mount parts.
I eventually graduated to surface-mount components and a hot air gun - this let me shrink the size of all of my passive components, opened up a super wide library of useful ICs, but still had some challenges. I was just using a syrnige with a small tip to dispense solder paste, which got messy and I often (particularly for ICs with small/close-together leads) dispensed too much, requiring annoying solder wicking. Sometimes I’d blow parts away with my hot air gun. It was a pretty slow and frustrating process, basically ‘worth it’, but I wasn’t loving life. This also was still leaving certain IC packages still out of reach - anything with pads under the part wasn’t going to work. This would include any BGA package, or even this microphone part!
So now I trade away a little extra money for an easy, single-step assembly process. I order a stainless steel solder paste dispending stencil from OSH Stencils, put a big blob of paste on the side, scrape a credit card over it, and every pad gets its own perfectly-sized little solder square on it. I then have a modified toaster oven that I use for large projects, and an adorable little hot plate, the MHP30 for tiny projects (particularly single-sided, like this one).
The neat thing is that OSHPark is able to send production files right to OSHStencils:
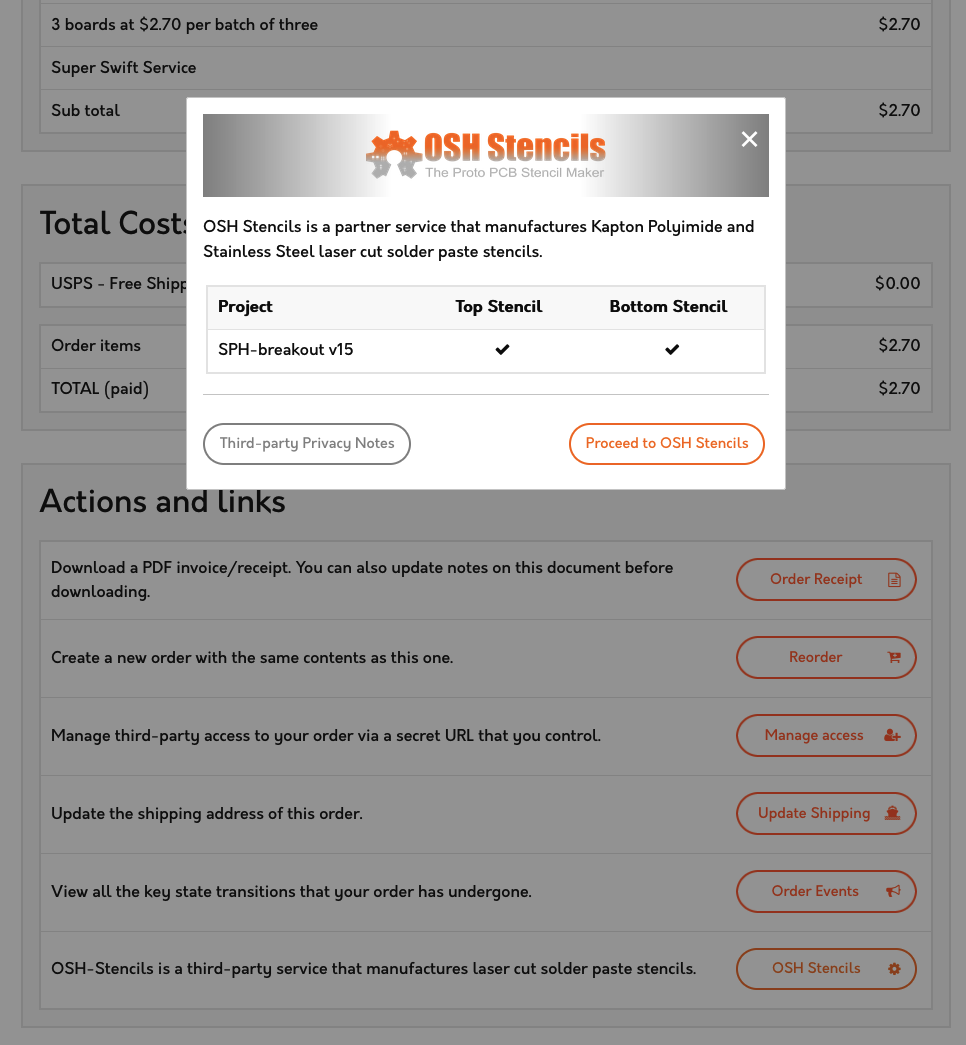
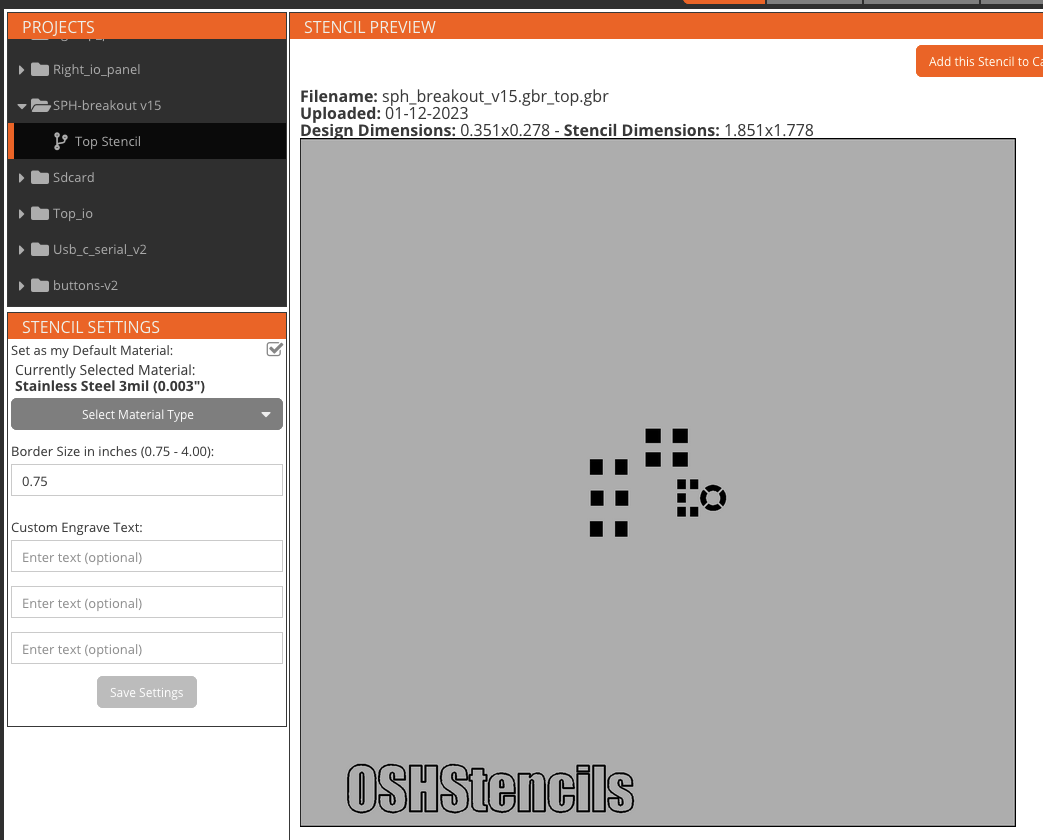
I’ve had some unsatisfying experiences with the plastic stencils - they like to curl up, and I often order parts with extremely tiny pads - so I tend to splurge for the stainless. Remembering to shrink the border to the minimum 0.75” to save some cash, we get a stencil that’ll be about $15:
Now - next we’re going to need to order the actual parts from Digi-Key.
Passive Components Check
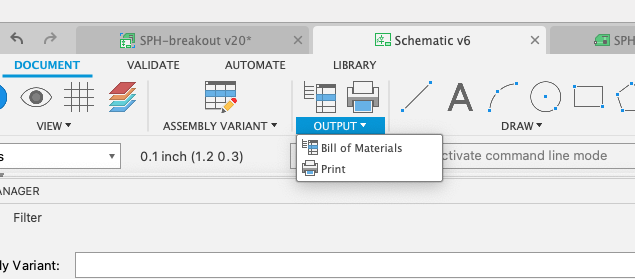
The first thing I’ll do is export my ‘shopping list’ from Fusion 360:

This gives me something to walk through at Digi-Key - basically I need 3 51Ω resistors, one each of a 0.1uF and 200pF capacitor, a pin header, and the SPH0645LM4H-B microphone itself.
The first thing I do is check to see what I actually have - I use a really handy site called PartsBox for this. This site keeps a database of all the parts you have in your storage, links to datasheets, records of when you’ve added them and taken them out, etc. It looks like I have some of these components already - that’s the value of, for little passives like this that cost pennies, just ordering 100 whenever you need 1.
The 200pF:

The 0.1uF in 0603: (I have lots in the more fiddly 0402 also from different projects):

But no 51Ω resistors, just a 4-wide 51-ohm resistor array that I used for a different project:

So we’ll need to order the mic and the resistors on Digi-Key.
Passive Component Ordering
In parts 1 and 2 I went into some detail on how I chose IC parts using a combination of manufacturer brochures, datasheets, and what’s actually orderable. Passive components present even more overwhelming choice - but it’s still possible to narrow it down with Digi-Key’s great parametric search.
Selecting “Passives -> Resistors -> Chip Resistor - Surface Mount” and selecting “Active” “In Stock” and “51Ω” gets us down to 236 results and then adding “Package/Case” -> 0603(1608 Metric) takes us to a more reasonable place with just 48 results:
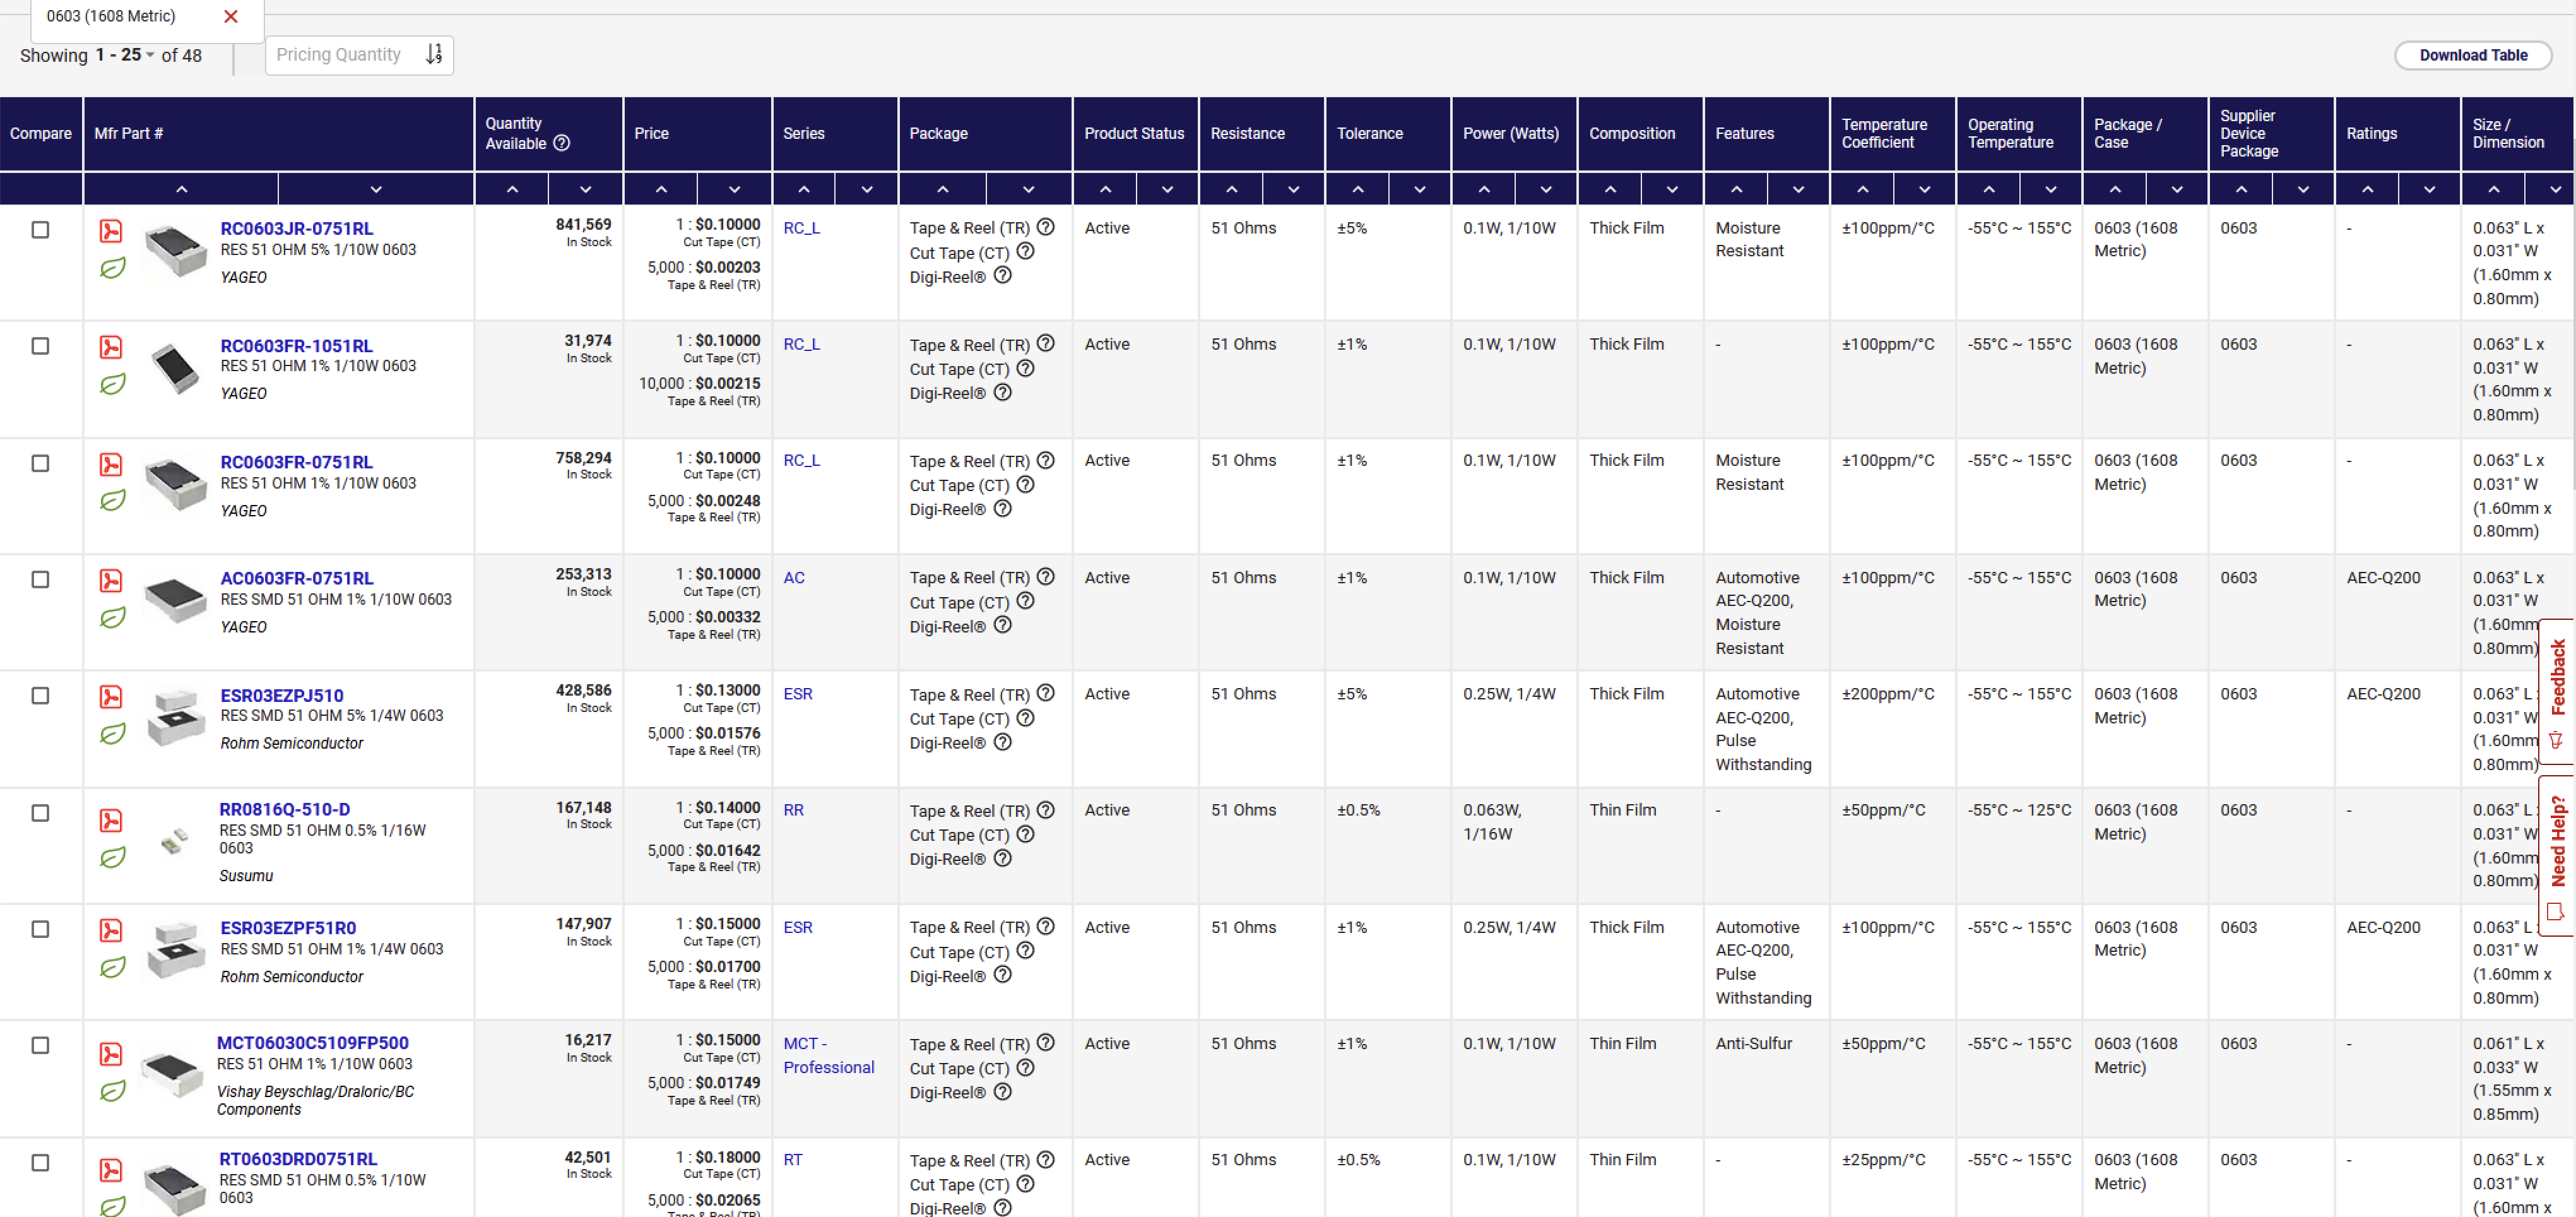
10 cents sounds about right per part. Generally for a passive component, unless it’s doing something weird, it should cost next to nothing. I had noticed before I narrowed to 0603 that the top results were 56 cents per - but looking more closely, those were resistors that could dissipate 2 watts! Here I’m happy to take the first result. The savings in bulk are crazy - it’s just 6x as expensive to order 100 of them, so I’m going to do that.
I’m then going to put 3 SPH0645LM4H-B microphones into my cart - since I’m imagining I’ll need some for further prototypes. The rest of the components, including a bunch of break-apart male pin headers, I already have in my parts storage.
The total comes to $16.71. So at this point total costs of the project are:
| PCBs | $2.70 |
| Stencils | $14.74 |
| Parts | $16.71 |
| Total | $34.15 |
Part 5 is going to be either on designing our next breakout, or assembly of this one - depending on which happens first!